
Affiliate disclosure: this article contains affiliate links. If you buy through them, DrawBySight may earn a commission at no extra cost to you. Read our affiliate disclosure.
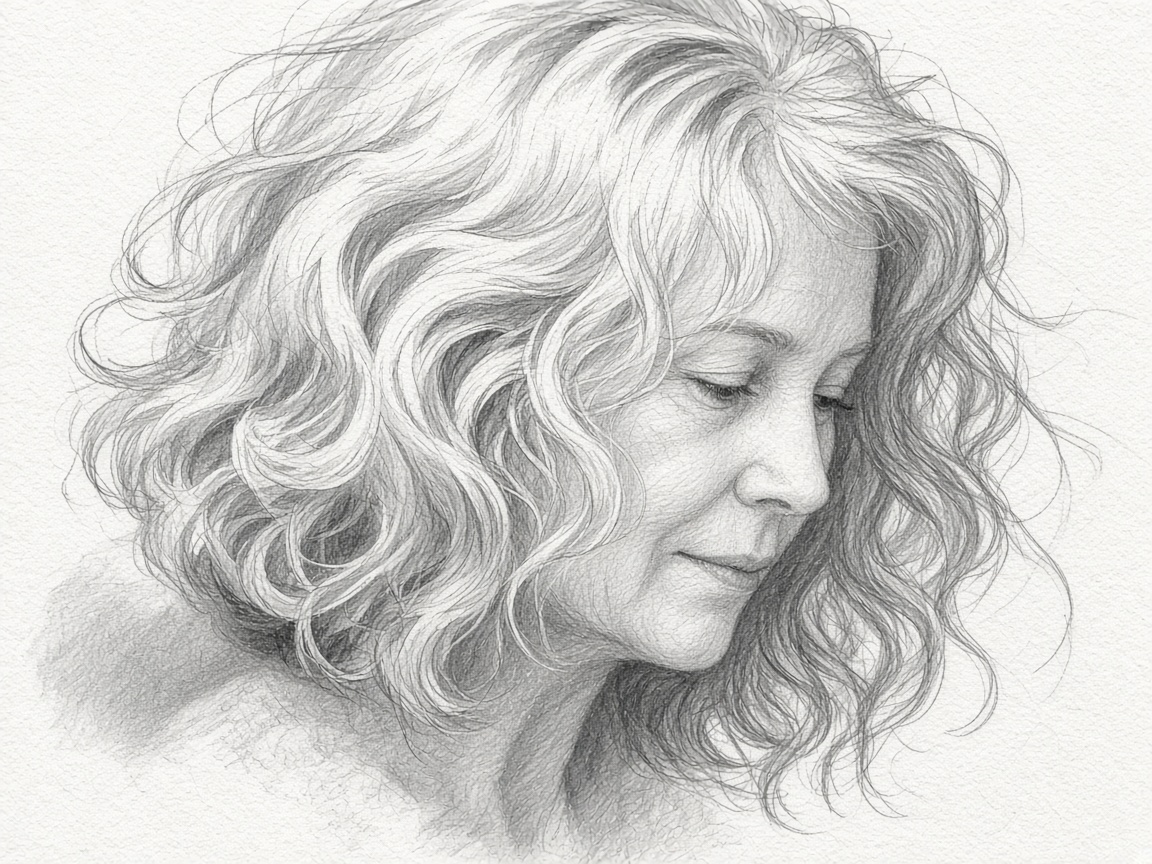
Knowing how to shade hair is what separates a portrait that looks real from one where the hair looks like a helmet or a loose wig. The instinct is to draw every strand, one line at a time. That takes hours, and it usually looks worse: flat, stripy and busy. Realistic hair in pencil comes from the opposite approach. You shade the big shapes of light and shadow first, then suggest strands only where they matter, so the viewer’s eye fills in the rest.
This guide covers how to draw realistic hair with pencil step by step, then how to adapt the method for dark, blonde, white and grey hair, including white beards, which follow the same rules.
How to shade hair: the essentials
- Hair is a mass, not a pile of lines. Shade it as large shapes of light, midtone and shadow first.
- Find the direction of growth and make every stroke follow it.
- Plan the highlight bands and keep them light from the start.
- Use tapered strokes: start pressure where the hair is darker and lift off toward the light.
- For white or grey hair, shade the shadows between the locks and leave the paper for the hair itself.
Materials for shading hair
| Tool | What it’s for |
|---|---|
| H or HB pencil | The base tone and light strands |
| 2B pencil | Midtones and the shadow side of locks |
| 4B to 8B pencil | The darkest shadows, near the scalp and under locks |
| Blending stump or tissue | Blending the base layer into a smooth mass |
| Kneaded eraser | Lifting broad highlight bands |
| Precision eraser | Lifting fine, light strands over darker areas |
| Embossing tool or a dry ballpoint pen (optional) | Pressing grooves for fine white hairs before shading |
A sharp pencil matters more for hair than almost anywhere else. Keep a sharpener and sandpaper block handy and re-sharpen often while you work on strands.
How to shade hair step by step
Step 1: Map the big shapes
With a light HB, draw the outer shape of the hair, then divide it into the main locks or clumps. Hair rarely sits as one even surface; it parts, overlaps and falls in groups. Lightly mark where the hairline meets the forehead, where the parting is and where the biggest shadows fall, for example behind the ear, under overlapping locks and where the hair meets the neck.
Don’t draw the outer edge as a hard line. Hair has soft edges, with a few stray strands breaking the silhouette.
Step 2: Mark the direction of growth
Draw a few light arrows or flow lines showing which way the hair grows and falls. Hair grows out from the scalp, often from a crown at the back of the head, and falls with gravity. Every stroke you make later should follow these lines. Strokes going the wrong way are the main reason hair looks scribbled.
Step 3: Plan the highlight bands
On shiny hair, light usually forms bands that wrap across the curve of the head and across each lock, rather than running along the strands. Find them in your reference and keep these areas light. On a round head, the highlight band often forms a curved shape across the top of the hair.
Step 4: Lay the base tone
Fill the hair with an even base layer that matches the lightest midtone, using an HB with strokes that follow the growth direction. For dark hair, you can use a 2B. Blend this layer with a stump or tissue, also in the direction of the hair, to create a smooth mass. Keep the highlight bands lighter or lift them with a kneaded eraser afterwards.
At this point the hair should look like a smooth, soft shape with the right overall darkness. That’s the foundation of realism.
Step 5: Build the shadows
With a 2B, then a 4B or 6B for dark hair, darken the shadow areas: near the scalp, under and between locks, at the parting and where the hair turns away from the light. Use long, tapered strokes that start in the shadow with firm pressure and lift off as they move toward the light. Group your strokes into clumps rather than spreading them evenly.
This is where hair gains depth. The darkest darks should be deep, but only in a few places, usually where one lock tucks under another.
Step 6: Suggest strands in the transitions
You don’t need strands everywhere. Add them mainly where light and shadow meet, at the edge of the highlight bands and along the outer silhouette. Use a very sharp HB or 2B and quick, flicking strokes. A few dozen well-placed strands do more than hundreds of evenly spaced lines.
Step 7: Lift light strands
With the sharp edge of a precision eraser or a kneaded eraser pinched into a blade, lift thin light strands across darker areas, following the growth direction. This creates the impression of hair crossing over hair, which is what gives depth without drawing every strand.
Step 8: Soften the edges
Finally, look at where the hair meets the face, the background and the neck. Soften the hairline with light, short strokes so it doesn’t look like a wig. Add a few stray hairs breaking the outer edge, and make the hair at the back of the head fade slightly as it turns away from you, so it doesn’t look like a flat cutout.
How to avoid hair that looks like a wig
The “loose wig” look comes from three things:
- A hard hairline. Real hairlines are soft and irregular, with fine short hairs at the edge. Use light, short strokes growing out of the skin.
- No shadow on the skin. Hair casts a shadow on the forehead, temples and neck. Shade it, and the hair will sit on the head.
- Even tone everywhere. Hair at the back of the head is often darker or less detailed than the front. Without that variation, the hair looks flat and detached.
If the hair is done but the face still looks pale and flat next to it, our guide on how to shade a face covers building skin tones to match.
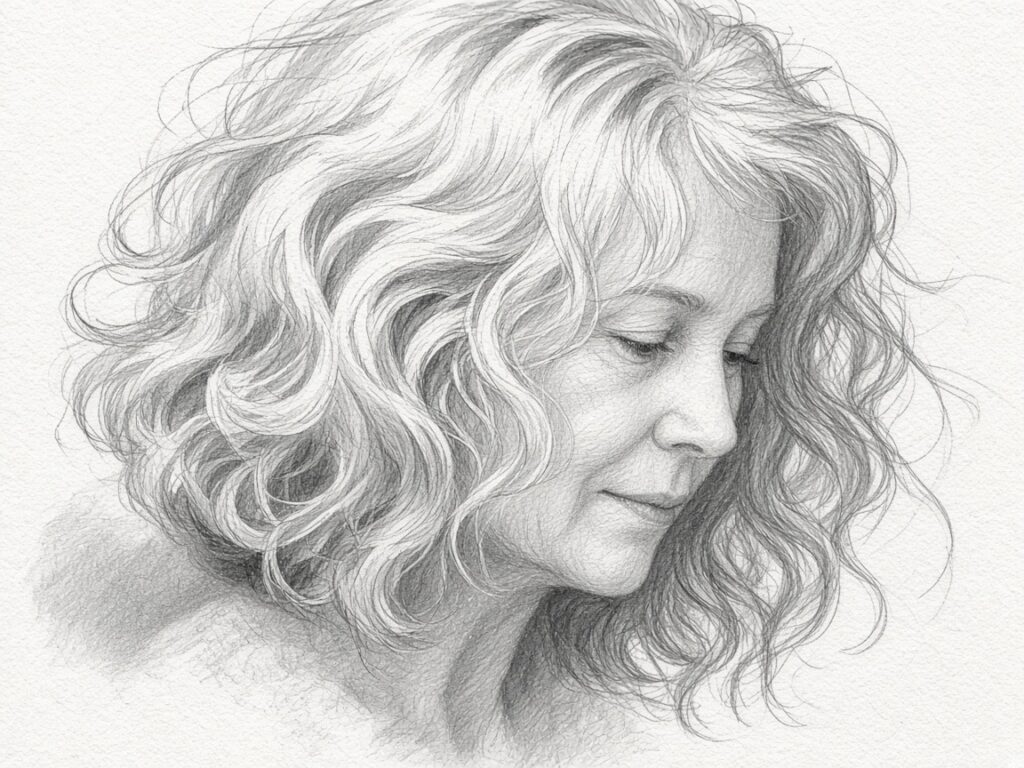
How to draw white hair and grey hair in a pencil portrait
Shading white hair turns the usual approach around. Because the hair itself is light, you draw it mostly by shading what’s around and between it.
- Map the locks carefully. With white hair, the shapes between the locks carry the drawing, so get them accurate.
- Keep pencils hard. Use 2H, H and HB for most of the work, and a 2B only in the deepest gaps.
- Shade the shadows between locks, not the locks themselves. Lay soft tone in the gaps, under each lock and near the scalp, and blend lightly.
- Give each lock a soft shadow side. White hair is still a three-dimensional form: shade the side of each lock away from the light very lightly.
- Use the background. A mid-grey background behind white hair makes it stand out. Without it, white hair against white paper can disappear.
- Lift fine strands with a precision eraser or emboss them before shading so they stay white.
Grey hair is usually a mix of white and darker strands, sometimes called salt-and-pepper. Shade it as a light-to-mid grey mass, then add some darker strands with an HB or 2B and lift some light ones. Keep the contrast between them lower than you’d expect; too many dark strands make grey hair look dark.
How to draw a white beard
A white beard follows the same rules. Shade the skin and shadows under and between the beard hair, keep the beard itself light and use short, curved strokes that follow the direction of growth along the jaw and chin. The darkest areas are usually under the chin and where the beard meets the lip. For stubble, use tiny dots and short dashes on a light skin tone rather than lines.
How to draw blonde hair
Blonde hair sits between dark and white hair. Use mostly H and HB, with 2B only in the darkest parts. The highlight bands are broad and bright, and the midtones are pale. Many beginners make blonde hair too dark because they draw lines everywhere; keep the strand work light and leave plenty of paper showing through.
Common problems when you shade hair
| Problem | Cause | Fix |
|---|---|---|
| Hair looks like straw or spaghetti | Individual lines drawn evenly everywhere | Blend a base tone first, then add strands only in transitions |
| Hair looks flat like a helmet | No highlight bands or shadows between locks | Lift highlight bands and darken where locks overlap |
| Hair looks like a wig | Hard hairline, no shadow on the skin | Soften the hairline and shade the shadow the hair casts |
| Hair looks scribbly | Strokes going in many directions | Follow the flow lines you mapped in Step 2 |
| Dark hair looks shiny and patchy | Pressing too hard with a soft pencil | Build darks in layers and keep pressure moderate |
| White hair disappears | Paper too white around it | Shade a soft background and the shadows between locks |
Practise shading hair
A useful exercise is to draw one lock of hair three ways: once with only lines, once with only blended tone and once with tone first and selected strands on top. Seeing the three side by side makes it clear why the third approach looks most realistic. Once you’re comfortable, try it in a full portrait. Our guides on how to draw a realistic eye and grid method drawing help with the rest of the face.
For real-time demonstrations, the hair lessons in Pencil Drawing Made Easy cover straight, curly, light and dark hair, sunlit highlights and creating the impression of every strand without drawing them all, and there are separate lessons on stubble and short, long and grey beards.
Frequently asked questions
How do you shade hair without drawing every strand?
Treat the hair as large shapes first. Lay a smooth base tone, darken the shadows between locks and keep the highlight bands light. Then add strands only where light meets shadow and lift a few light strands with an eraser. The viewer’s eye fills in the rest.
What pencil is best for drawing hair?
Use a range. HB for the base tone, 2B for the midtones, 4B to 8B for the deepest shadows in dark hair, and H or 2H for light and white hair. Keep the pencils sharp for strand work.
How do you draw white hair with a pencil?
Draw the shadows rather than the hair. Shade the gaps between locks and the area near the scalp with hard pencils, give each lock a soft shadow side and add a mid-grey background so the white hair stands out against it.
How do you make hair look shiny in a drawing?
Keep clear highlight bands that wrap across the locks, make the shadows next to them darker for contrast and lift a few light strands across the highlight. Shine comes from contrast, not from drawing more lines.
Why does the hair in my drawing look like a wig?
Usually the hairline is too hard, there’s no shadow on the skin from the hair, and the hair has the same tone everywhere. Soften the hairline with short strokes, shade the hair’s cast shadow and let the back of the hair fade.
1 thought on “How to Shade Hair in Pencil (Including White and Grey Hair)”