
Affiliate disclosure: this article contains affiliate links. If you buy through them, DrawBySight may earn a commission at no extra cost to you. Read our affiliate disclosure.
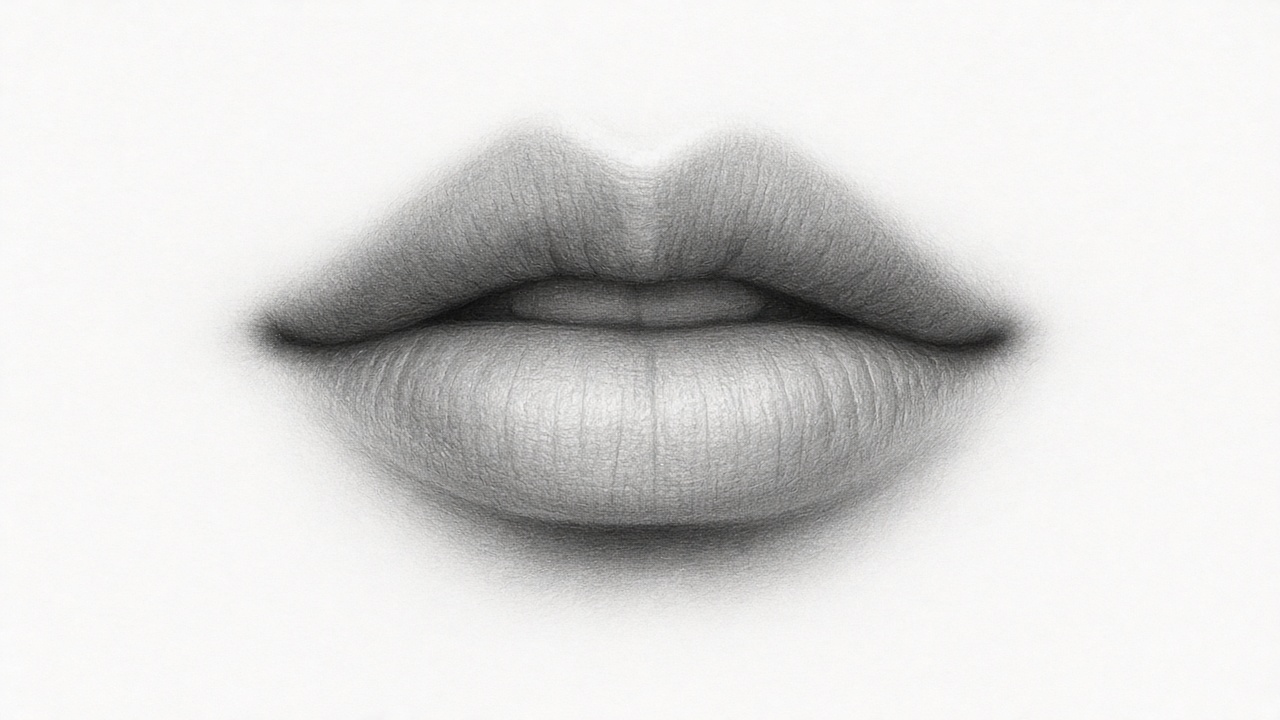
If you want to know how to draw realistic lips, the most important thing to understand is that lips have no outline. In a photo, the edge of the mouth is simply where one tone meets another: the darker upper lip against lighter skin, the lit lower lip against the shadow beneath it. Draw a hard line around the lips and they immediately look like a sticker. Build them from tone instead and they look soft, full and three-dimensional.
This step-by-step guide shows you how to draw a realistic mouth in pencil, from the first light shape to cracks, highlights and the soft edges that make lips look real, along with the pencil grades to use and fixes for the most common problems.
How to draw realistic lips: the essentials
- Find the lip line first. The dark line where the lips meet is the anchor for everything else.
- The upper lip is usually darker because it faces down, away from the light. The lower lip faces up and catches light.
- Don’t outline the lips. Let the edges appear where tones change, and keep some edges soft.
- Shade in the direction of the lip’s form, with gentle vertical curves that follow the creases.
- Lift highlights last with a kneaded eraser, mostly on the lower lip.
Materials for drawing lips
| Pencil or tool | Use on the lips |
|---|---|
| 2H or H | Light placement lines and the palest skin around the mouth |
| HB | First layer on both lips, the philtrum and chin shadows |
| 2B | The upper lip, creases, corners of the mouth |
| 4B to 6B | The lip line where the lips meet and the darkest corners |
| Blending stump | Smoothing the lip surface and the skin around it |
| Kneaded eraser | Lifting soft highlights and lightening hard edges |
| Precision eraser | Small sharp highlights and thin light creases |
Choose a reference photo with clear, directional light, ideally from above and slightly to one side, so you can see a definite difference between the upper and lower lip.
How to draw realistic lips step by step
Step 1: Place the mouth with light guidelines
With a 2H pencil and very light pressure, mark the width of the mouth. In a front view the corners of the mouth usually line up roughly with the centres of the eyes or a little inside them; check your reference rather than relying on a rule. Draw a light horizontal line for the centre of the lip line, then mark the centre point.
Step 2: Draw the lip line
The line where the lips meet is the darkest and most important part of the mouth. It is not straight: it dips in the centre under the cupid’s bow, curves gently up and then down toward the corners. Sketch it lightly with an HB, following the reference. Don’t darken it yet.
Step 3: Sketch the shapes of the upper and lower lip
Lightly indicate the cupid’s bow, the two peaks at the top of the upper lip, and the small groove above it called the philtrum. The upper lip often looks like a flattened “M”, the lower lip like a soft, wide “U”. Notice that the lower lip is often fuller than the upper.
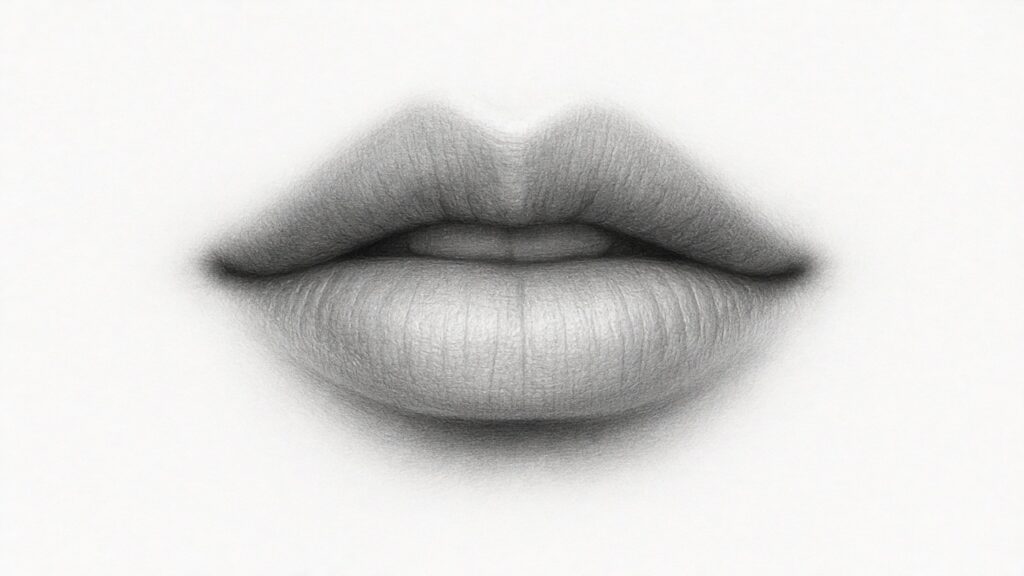
These are placement marks only. You’ll shade over them, and in the finished drawing the edges will be created by tone. This is the key to drawing lips without outlining them.
Step 4: Shade the upper lip
The upper lip slopes down and away from a light source above, so it is usually the darker of the two.
- Lay an even HB tone over the whole upper lip using light, curved strokes that follow its shape.
- Add a second layer with a 2B, darker near the lip line and the corners, slightly lighter at the top where the lip turns toward the light.
- Blend lightly with a stump.
- Keep the top edge of the upper lip slightly soft where it meets the skin, especially at the outer ends where the lip colour fades.
Step 5: Shade the lower lip
The lower lip faces up toward the light, so it’s lighter and often has the strongest highlight.
- Shade the lower lip with an HB using gentle vertical strokes that curve with its shape. These vertical marks hint at the natural creases of the lips.
- Darken the area just under the lip line and toward the corners with a 2B.
- Leave the central area of the lower lip lighter, where the highlight will sit.
- Don’t draw a line along the bottom edge. Instead, shade the shadow under the lower lip on the chin. This shadow is what defines the bottom of the lip.
Step 6: Darken the lip line and the corners
Now go back to the lip line with a 4B or 6B. Make it darkest at the corners of the mouth and in the centre, and let it lighten slightly in between. The corners are small, deep shadows that often connect to a soft crease in the cheek; they give the mouth its expression.
If the lips are slightly parted, the gap is a dark shape, but rarely pure black. You may see a hint of the teeth or the tongue; keep them very soft so they don’t compete with the lips. If you’re drawing an open smile, our guide on how to draw teeth shows how to keep teeth white without outlining each one.
Step 7: Add creases and lip cracks
Lip texture is what makes a realistic mouth look alive, but it is easy to overdo.
- Creases run roughly vertically and fan out slightly from the centre of the lip. Draw them with a sharp HB or 2B as short, broken strokes, not long continuous lines.
- Pair each dark crease with a light ridge. Lift a thin light line right next to some of the creases with a precision eraser. A crack is a tiny valley: it has a dark side and a lit edge.
- Keep them subtle on the upper lip and stronger on the lower lip, where the light reveals texture.
- Follow your reference. Smooth, glossy lips have very few visible cracks; dry lips have more.
Step 8: Lift the highlights
Shape a kneaded eraser into a point or edge and dab, don’t rub, to lift highlights on the lower lip. Glossy lips have bright, clearly defined highlights; matte lips have softer, broader ones. You’ll usually also see a faint highlight on the ridge of the upper lip just above the cupid’s bow, and small highlights at the top of the philtrum ridges.
Step 9: Blend the mouth into the face
Finally, shade the skin around the mouth so the lips belong to the face. Add the soft shadow under the lower lip, the shading in the philtrum and the gentle tones at each side of the mouth. Soften any edges that look too sharp, especially the outer ends of the upper lip and the bottom edge of the lower lip. For smooth transitions in skin, see our guide on how to shade a face.
Common problems when drawing realistic lips
| Problem | What’s going on | How to fix it |
|---|---|---|
| Lips look like a sticker | A hard outline all the way around | Erase the outline and define the edges with the upper lip tone and the shadow under the lower lip |
| The mouth looks flat | Upper and lower lip are the same tone | Darken the upper lip and keep the lower lip lighter, then add the shadow below it |
| Lips look like stripes | Too many evenly spaced, dark crease lines | Lighten with a kneaded eraser, then redraw fewer, broken creases with highlights beside them |
| The mouth looks too wide or narrow | Corner positions guessed | Measure the corners against the eyes or the nose in your reference |
| Highlights look chalky | The surrounding tone is too light | Darken around the highlight so it has contrast, rather than making it bigger |
| The smile looks forced | Corners drawn as hard dark hooks | Soften the corners and blend them into the cheek crease |
Drawing lips from different angles
In a three-quarter view, the far half of the mouth is shorter than the near half, and the far corner is partly hidden by the curve of the face. The cupid’s bow shifts toward the far side, and the far half of the upper lip is often almost hidden. In a profile view, the upper lip usually projects a little further than the lower lip, and the lips sit on a curve that follows the teeth and jaw underneath. In both cases, it helps to think of the mouth as wrapping around a cylinder rather than lying flat on the face.
Practise drawing lips
Try this short exercise: draw the same mouth twice from one reference photo. In the first version, use only three values, light, middle and dark, with no blending at all. In the second, do the full nine steps. The first study trains you to see the big tonal shapes that define the mouth; the second adds the refinement. Many beginners find their three-value study already looks more realistic than earlier attempts, simply because there is no outline.
Once your lips look convincing, try pairing them with a matching eye study using our guide to how to draw a realistic eye, and then put the features together in a full portrait.
If you want to see the process demonstrated in real time, the mouth lessons in Pencil Drawing Made Easy cover realistic lips including lip cracks, and closed, open and smiling mouths. Our Pencil Drawing Made Easy review explains what else the course includes.
Frequently asked questions
How do you draw lips without outlining them?
Sketch the shape with very faint guidelines, then let tone do the work. Shade the upper lip darker than the skin above it, darken the lip line where the lips meet and shade the shadow under the lower lip. Those tonal changes create the edges, so no outline is needed.
Which lip is darker in a drawing?
Usually the upper lip, because it slopes down and away from overhead light. The lower lip faces up toward the light and is generally lighter, with the main highlight. Strong side or low light can change this, so always check your reference.
How do you draw cracks in lips?
Draw short, broken, roughly vertical strokes with a sharp HB or 2B that fan slightly outward from the centre of the lips. Lift a thin highlight next to some of them with a precision eraser so each crack has a dark side and a lit edge. Keep them subtle, especially on the upper lip.
What pencils should I use to draw realistic lips?
An H or 2H for placement, HB for the first layer, 2B for the upper lip and creases and a 4B to 6B for the lip line and corners. Add a kneaded eraser for highlights and a blending stump for smooth tones.
How do you make lips look glossy?
Keep the highlights bright with crisp edges, make the tones around them a little darker for contrast and smooth the lip surface with a blending stump before lifting the highlights. Matte lips have softer, broader highlights and more visible texture.
1 thought on “How to Draw Realistic Lips With Pencil: A Step-by-Step Guide”